Adding a logo and white-labeling your portal is done via the Branding application. The steps below will walk you through how to begin this process.
<aside>
💡 NOTE: This documentation refers to the Monster UI Branding Application
</aside>
General tab

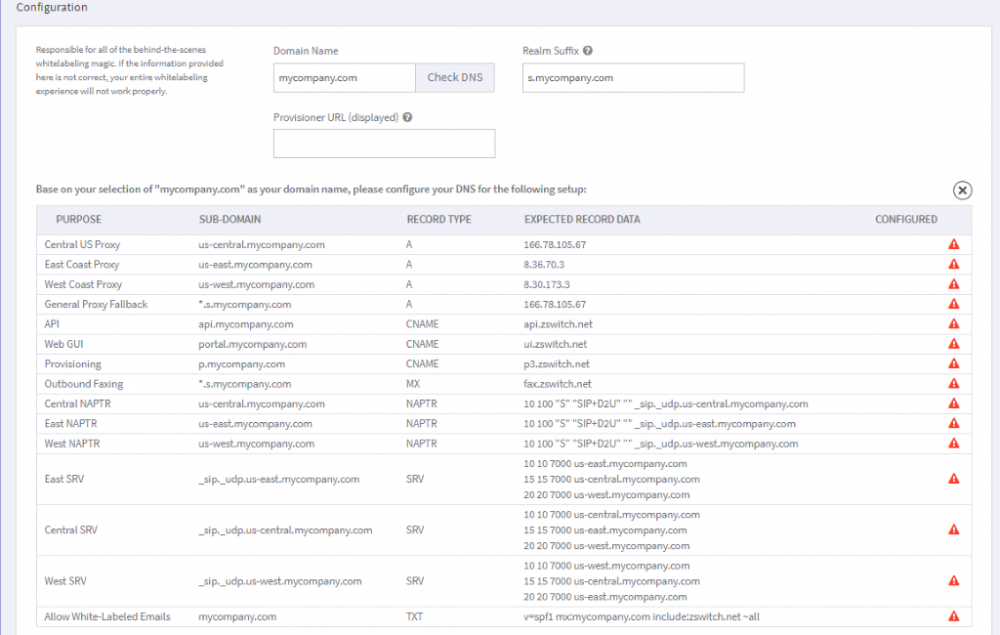
Configuration
- From the General tab, in the Configuration section, enter a Domain name. This should be the string you would like your customers to use to get into their account. For Example: portal.mycompany.com
- Once you have entered the Domain Name, click Check DNS. A list of suggested sub-domains will be provided along with their purpose, record type and record data that can be used to set up your DNS records.

- Optionally, you can enter a Provisioner URL. This is what will be displayed at the top of the Provisioner app and can be helpful in a more user-friendly name.NOTES:
- We we recommend completing this DNS Mapping setup prior to setting up any new accounts. This will ensure all accounts will use the white label path structures.
- For a detailed user guide showing and explaining this process please review the "Branding: Set up your White Label DNS" document, found under the Branding / User Resources category here.
- The Realm Suffix is used to generate the account realms for your accounts using your white-labeled interface. This should be a prefix on your domain name, so in the example above, your realm suffix might be, s.voice.mydomain.com. This would also be your “wild card” in your DNS records.

- The Provisioner URL can be set as well to replace the API URL displayed on the Provisioner App. This can be populated with the suggested sub-domain for Provisioning as shown in the suggested DNS records


